Liked it? Then download THESE FILES and let's get started.
1. Open Adobe After Effects -> Create a New Project -> import my Shot.mov (, Thunder.wav and Wind.wav sounds into Project window. Or you can choose your own video and audio samples.
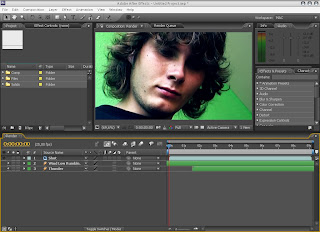
2. Creat a new Composition, name it Render and arrange it exactly as seen on the Image 1.
- Don't forget to turn the Audio Levels slider down. "-10" for Wind.wav, "-20" for Thunder.wav. This way it will sound more balanced.
3. 3. Now create a new Adjustment Layer and name it Flash (select the layer and hit Enter). With the layer selected choose effect -> Color Correction -> Brigtness & Contrast.
- Set "80" for Brightness and "50" for Contrast. This way, our lightning flash effect is ready. You can play with it, find other solutions, maybe add a bit of glow, but do it after you finish this tutorial. First understand the procedure.
4. Let's animate the effect according to the Thunder.wav sound. With the Thunder layer selected, right click -> Keyframe Assistant -> Convert Audio to Keyframes.
- This option will create a new null layer, containing the amplitude data turned into keyframes.
- Now, before you click it, make sure you MUTE the Wind.wav layer, because the option turns ALL THE AUDIO IN THE COMPOSITION into keyframes - and we want to use it just for Thunder layer.
Therefore click it only with the Wind layer muted.
5. New layer called Audio Amplitude was created.
- If you look at the effects it's containing (F3), you will see three of them - Left and Right Channel and Both channels. Go ahead and delete the Left and Right Channel. You can leave them, but I like getting rid of everything I don't need in the composition - and we won't use them. We will use just the Both Channels Slider.
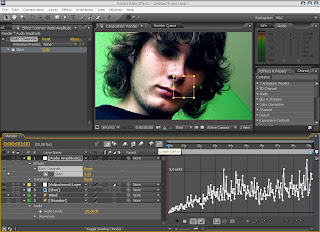
- Now, all we have is the Both Channels slider. If you select the Slider and click Graph Editor (see the image 2), you will see the audio amplitude turned into a keyframe graph.
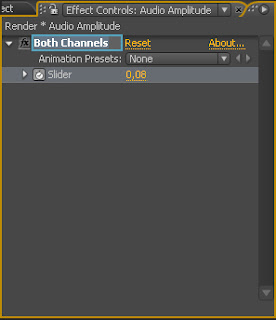
6.Select the Both Channels effect in the Effect Controls window, hit Enter and name it "Brightness" (image 3). Now hit Ctrl+D and duplicate the effect. Name the second one "Contrast".
7. Now the things get a little tricky. We want to make these sliders control our two effects applied on the Flash Layer.
- On the timeline, select the Flash Layer and hit E twice (or just open the small triangle on the left side of the layer). This opens the Brightness and Contrast sliders.
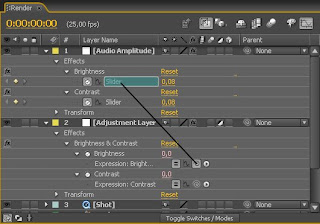
- Hold down ALT and click on the Stop watch right next to the Brightness slider. This way we add Expressions to the layer. But don't worry, we're not going to write anything, just click on the little spiral icon called Pick whip and drag it over the Brightness Slider in the Audio Amplitude layer. See the image 4.
- Do the same thing with the Contrast slider.
- Now, the video should be flashing only a very, very little when the sound of lightning hits (to preview the video with sounds press Numpad 0). It really is almost unnoticeable, but don't worry, we'll correct it in the next step. Just make sure it's working.
8. The things are getting even trickier. The lightning flashes are now animated according to the sound, but they're animated just from 0-100% of the original value (= 80 for Brightness and 50 for Contrast). This is what makes it almost invisible. How to make the flashing grow linearily? We use expressions!
- Click on the Audio Amplitude layer and hit E twice. This opens the sliders.
- ALT click on the Brightness slider stop watch and type in the expression (you can simply delete the first one): "linear(value,0,100,0,1000)" (without quotation marks). Translation: When the Amplitude is 0 make it 0. When it's 100, make it 1000. Anything between those values will be then multiplied correctly.
- Do the same thing with the Contrast slider. You can simply copy and paste the expression. (image 5)
- The flashing should grow. If not, you did something wrong.
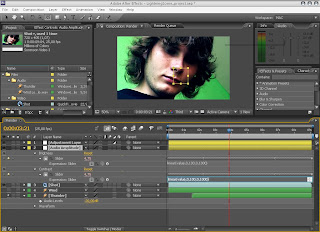
9. The effect is now complete. But the colors are somehow wrong. When there's a storm outside, it's usually cloudy, dark and all the colors slightly fade away.
- Create a new Adjustment Layer, name it Filter. Right click on the layer, choose Effect -> Color Correction -> Hue/Saturation and turn the Master Saturation value down to -60.
10. You can RAM preview the video. It looks pretty good now, but we're still not done yet. The real lightning strikes only for a split second and it's gone. Our flash keeps flashing.
- Select the Flash layer and hit T. This brings down the Opacity controller. On the timeline get to the point where the lightning hits for the last time (you can select the Thunder layer, hit L twice and then find the last widest point of the amplitude).
- Hit the Opacity stop watch and set a keyframe to 100% (it already is set to 100%, just make sure the keyframe is created).
- Go 12 frames forward and create another keyframe. Turn the Opacity down to 0%.
That's it. We've created a lightning flash in 10 steps. I hope you'll find this tutorial useful and use it in your movies. If you have a problem, just ask, if you don't want to ask, just go through my LightningFlash project. See you next time.
- Martin

oh good job...i was looking for something like this
ReplyDeletehi is there any way u could make a video tutorial on how to do this, please
ReplyDelete