Friday, 11 December 2009

Fallout-like Environment

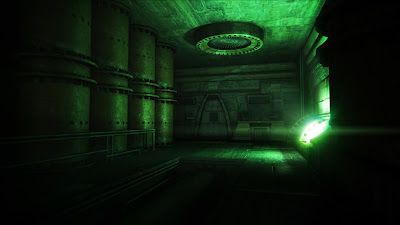
I tried this game called Fallout 3 few days ago and I got really inspired by its postapocalyptic look. So I decided to create some similar environment. This is a result of one loong night full of modeling, texturing and lighting. I'll probably revisit it when I'll have some more time though...


I used just a simple Area and Directional light setup and then I rendered out Ambient Occlusion pass which I comped in by using the Overlay mode. Textures come from CGTextures.com. All the models are just very simple shapes, cylinders and boxes mostly.

- Martin

Monday, 30 November 2009

Shadows of the Past Teaser 2!

This a second teaser for our upcoming Star Wars fanfilm Shadows of the Past, full of new and updated shots.
For the first time in the history of our studio we have our own music track, created by Tomas "Meridius" Zemler. If you like it, be sure to visit his web http://meridius.ic.cz/
The film is about to be released on January 2010.


- M.

Saturday, 7 November 2009

SotP Update...Rendering in Progress

These days are full of rendering, compositing and finalizing the CG shots. Actually I must say Im pretty happy with the way they come out. Seeing it on a picture is one thing... watching it move is completely different. There's still a lot of work ahead though. After I finish CG shots, I must also finish the final cut. Then our composer's going to start his job, lightsaber artists will begin the often tedious but necessary rotoscoping and meanwhile I shall work my way through stabilizing, color correcting, adding fancy effects and removing ugly objects and even uglier graffiti. And then there's of course the sound editing - but Ive collected a wonderful gallery of great sci-fi sounds, so I'm pretty confident at that.

Uff, it's going to be a hell of a lot of work these next two months. But I have a good feeling that it's going to be worth it. But enough talk, here's an image from the updated Striker flyby shot...


Two more things. First, Daniel Maher, our lightsaber artist from the Power of the Dark Side is back and he'll be making the lightsabers move and shine. Great news indeed.

Second, we have a new fan page on Facebook. So if you have your account, be sure to favor us with your fan subscription...

- M.

Monday, 2 November 2009

SotP Work in Progress...again

Ive been doing a lot of freelance work lately, but now I'm finally back on track with Shadows of the Past. And I decided to revisit some space shots and improve them. Just watch the pictures...

Version 2:


Version 1:


I think its a step forward :-)
- M.

Sunday, 25 October 2009

Cave Exodus

Another painting...Getting used to tablet.


And here's my little making of.


- M.

Friday, 23 October 2009

Monster & Factory Updates

I've done some improvements on my Monster. Still not final though. I need to learn texture painting in Zbrush.


I also advanced on the factory model. Added some lens blur, film grain, color corrected and overall improved the models.


- M.

Thursday, 22 October 2009

Desert Encounter

I finally got myself my first tablet. I'm pretty satisfied with it though very clumsy at working with it at the moment. Anyway, I tried some digital painting with it. Somehow, I'm not really happy with how it came out...But anyway. Trial a error is the best teacher, huh? :-)


- M.

Tuesday, 20 October 2009

Fooling Around in ZBrush

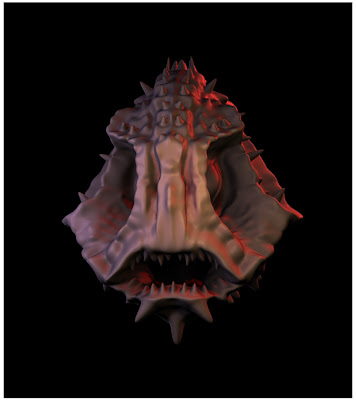
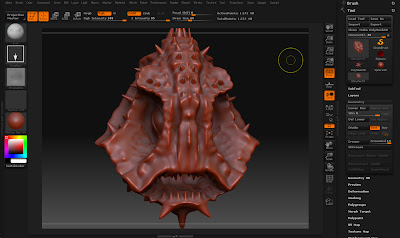
I've started using a lot of new software recently. Interesting thing is the more tools I know, the easier it gets to learn new ones. And one of those I fell in love with at first sight is the famous Zbrush. This is the first model I'm currently working on...

Render:


Yeah, it's a monster. And hell yeah - it's so much fun! So long, organical modeling in Maya...

- M.

Sunday, 18 October 2009

First fully CG shot

This is a pic from my first fully CG shot I'm making for a short film. The models were made in Maya, textured by using Photoshop, brought together in After Effects.


- Martin

Sunday, 11 October 2009

Pillars of Ice & Finally Free

More paintings. I'm starting to like it...

Pillars of Ice


Finally Free


- Martin

Saturday, 10 October 2009

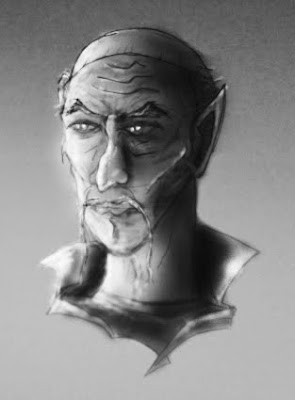
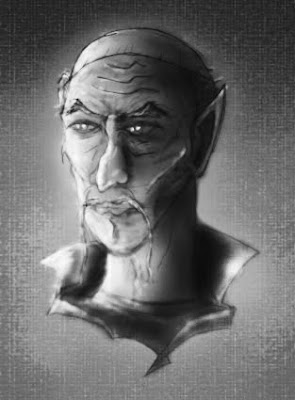
Ming - my first painting

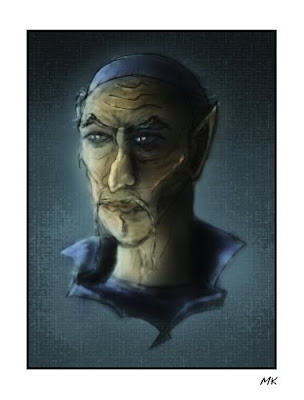
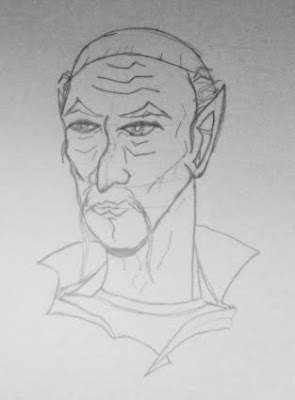
Some time ago I started with digital painting. Ive always been afraid of this, somehow felt its not really my cup of tea. But Ive tried it anyway and ended up quite surprised - it's really just about knowing some simple drawing, lighting and Photoshop rules.

Ming Final:


1.Sketch (Hand)


2.Light (Photoshop)


3.Texture (Photoshop)


- Martin

Saturday, 26 September 2009

Battle Charge figured out

I took FXPHD 301 Guerilla After Effects techniques course and finally figured out how were the visual effects for BBCs documentary Attila the Hun done. What more, based on the tutorial and with the help of provided footage i made my own version of battle charge - and found out how to make armies in Maya, After Effects and PFTrack. Great, it was totally worth the money.


So...how about some Lord of the Rings now, huh?

- Martin

Thursday, 17 September 2009

New CG Space Shot

Yet another space shot, this time fully 3d (yep, even the nebula). The amount of detail (the nebula is made of particles, overall scale is about 50,000 units with about 15,000 particles) makes it not exactly a render-friendly scene though. Guess Ill have to beware the scale next time. I guess that bigger aint better, especially in CG...


- Martin

Saturday, 5 September 2009

Shadows of the Past new pics

I've finally finished my next starship. It needs some extra touches, but I'm quite satisfied with the result. I also tried to add some Knoll Light Factory effects. I'm not sure all those lens effects are realistic, but I like how they look.


- Martin

Monday, 31 August 2009

Shadows of the Past teaser

And now, the main event of my summer...We've successfully shot our sequel for Power of the Dark Side. It's called Shadows of the Past, it's darker, bigger, more action filled and more in every possible aspect...Well, yeah, I'm thrilled indeed. Just have a look at the teaser.


The shooting of the first film took us 5 hours. The shooting of this one a week. The lightsaber fight in the first one is 1 minute long. Now it's 8 minutes. Plus there are big space ships floating through the space, futuristic cities being destroyed by orbital cannons, spacefighters everywhere and one young Sith tormented by his dark past.

Stay tuned for the whole movie. Coming this year.

- Martin

I'm back

Quite a lot has happened since my last post. In fact, Ive decided to delete this site some time ago...fortunately there's a great feature on blogger.com called Undelete blog...Why I deleted it? I thought I'm going to make my own website or portfolio of some sort, but in the end...eh, you know, no time. Well, so here I am, blogging again. And I have some great news indeed.

Let's start with some pictures. Lets say Ive learned quite a lot of CG lately, Maya, to be accurate. It's a great piece of software, so filled with possibilities that I sometimes feel overwhelmed. Modeling, texturing, dynamics, particles, fluids, animation - tons and tons of great stuff. I'm just a humble beginner, but Ill definitely try to improve.

Here are some images I've made. It's a combination of Maya and After Effects mostly.


One more thing. I thought that knowing After Effects makes me quite a good VFX guy. Well, no the case. As Ive found out, After Effects is a software great for creating title sequences, flashy graphics, maybe even some effects...but its not for compositing. And since compositing is the main part of VFX guys daily work, I think I have a lot to learn.

At least I have Nuke now...

- Martin

Saturday, 13 June 2009

The Way of Compositing

I thought I could share some images from Threads of Destiny and describe the basic compositing procedure. So, here we go, compositing in five steps.

1. Prepare for keying
Removing tracking points, deartifacting etc.

2. Keying

3. Preparing Background
Adding dynamic elements, filters, shadows etc.

4. Matching Foreground with BG
Color correcting, better edge croping and bluring, lightwraping etc.

5. Final Render
Some interactive lightning is always a good thing.


- Martin

Sunday, 7 June 2009

Updated Showreel

Well, summer is close, there`s never enough job and so I decided to update my reel and send it to some postproduction companies in Prague. We'll see if someone's going to like it enough to give me a perspective part-time job...


- Martin

Monday, 25 May 2009

Meet Bob

This is Bob. My very first CG character. This one I created in Maya. There's still much to do to make Bob look great, but I think he's going to look pretty scarry after I'm done with him... :-)


- Martin

Friday, 15 May 2009

Keying in After Effects


What is Keying?
- Keying is a procedure in which we extract a certain part of our video (e.g. actor) and make the rest transparent.
- We are using green or blue screen to help us in this procedure.
- In other words, we are setting up a proper Alpha Channel for our video.

What is an Alpha Channel?
- It is a Channel that defines which part of your layer is transparent (black color) and what part is opaque (white color).

What is the Color Keying?
- It is a procedure when we're using the layers RGB (Red-Green-Blue) values to extract a certain color range from the image.
- We often use green or bluescreen to help us in this procedure.

Why is there no 'redscreen'?
- Because most of the people have a little bit of red color present in their skin pigmentation and in case of using imaginary redscreen, we would probably always key out even a part of the face.

Why are we using greenscreen more than bluescreen?
- Because Blue Channel (Color) often creates more digital noise than Green Channel, which makes keying harder.

Exception!!! (Which I experience in almost every shot of Threads of Destiny) Blonde people should always be shot on a blue screen.

When picking a color for Color Keying, concentrate on the color that lies closest to the person's body.


Various Keying Tools in After Effects:
1) Color Key - pick a color, set tolerance, thin the edges and feather them. Even though you never really want your actor to be feathered around the edges.

2) Color Range - select more colors and the range of keyed out colors is created. Fuzzines is basically a feather option. Set Lab if you want a better key. Don't ask why, do it.

3) Linear Color Key - basically the same effect as a Color Key, with a difference that you can pick and add your tolerance manually on the screen.

4) Keylight - an award winning Keying tool and a built-in AAE CS3 plugin I like to use.

Spill Supressor - a great tool for getting rid of a green color from places like shadows etc.

THE FOUNDRY KEYLIGHT

a) View: ther are several view modes
- Source = shows the source video
- Source Alpha = shows the Alpha Channel of the source video
- Corrected Source & color Correction Edges = shows the changes in case of Pre-Color Correction
- Screen Matte = shows the newly created Alpha Channel. You need to set the Screen Colour below the View option in order to create the Alpha channel.
- Inside & Outside Mask, Combined Matte = shows the masks created in Inside Mask and Outside Mask dialog
- Status = shows your transparency only by using pure black, pure white and 50% grey colors. The 50% grey color indicates that the are is not 100% transparent nor 100% opaque. This helps you find spots of transparency you may have overlooked when playing with Screen Matte.

Gain: increases the gain of the picked Screen Color. Don't go over 150.
Screen Balance: Balancing the amount of grey pixels. Stay close to 50.

b) Screen Matte:
- Clip Black: increase to make grey pixels more black
- Clip White: decrease to make grey pixels more white
- Screen Shrink: expand or shrink the alpha matte
- Screen Softness: makes the edges of the matte feathered

c) Foreground Color correction:
- Choose enable to color correct the Matte, a very powerful tool inside the plug-in
- Colour Supression disables a certain Color from the unwanted Color Spill. Pick from the scroll-down menu and play with the Balance and Amount
- Colour Balancing changes the overall Hue and Saturation of the Matte
- In the Color Balance palette stay very close to white, if you want to achieve a natural result

d) Edge Color Correction:
- Choose enable to make active
- Similarly to the Foreground Color Correction you can adjust Saturation, Contrast, Brightness, Supression and Color Balancing for the Edges of your matte
- You can also specify the Edge Softness, Grow and Hardness here

e) Source Crops:
- You can crop your Matte here
- Pick the croping mode - you can either fill the crop with Color, repeat the same line of the cropped pixels, Mirror this line or Wrap it around. Experiment with these to see the result.
- By draging the Left to 100, you crop from the left side of the screen. By draging Right to 0 you crop the image from the right side of the screen. The same goes to Bottom and Top
- Drop the Edge Color Alpha to 0 to make the Color crop transparent

- Martin
Sunday, 10 May 2009

End of Universe

This is just another one of my VFX tests. I like blowing things and so...why the heck not blow the whole universe? But this time without using Trapcode Particular. So, this is how it's done with just AAE built-in plugins.


I'm also working on some effects for my fellow classmates animation movie. With any luck I'll post it here in a few days.

- Martin

Saturday, 9 May 2009

Latest Version of Possessed

Even though there aren't many important changes, there are at least few extra (subtle) effects in this version of my latest VFX short film. And it's on Vimeo now. And...bah, no more stupid reasons for posting it again. I'm just probably proud of it :-). Except the trainers, of course.


- Martin

Tuesday, 5 May 2009

Good News

I've been gone now for a few days, shooting a promo for this lovely group of hotels. It's been a great experience for me, to work with professionals from Video Art Production. And I also earned money to buy a new laptop. I'll probably switch to Apple Mac.

And one more good news - in a recent post I've posted trailer for a fanfilm called The Hunt for Gollum. The film is out now and it's brilliant indeed. Watch it here and visit the homepage.


- Martin

Monday, 27 April 2009

Tips for Using Masks in AE

Extracts from the book Adobe After Effects 7 Studio Techniques

- In case the layer's been rotated in 3D space, it's best to draw masks in Layer window instead of Composition. Just double click on the layer.

- To make a shape perfectly symmetrical, hold down Shift when drawing it.

- To draw a shape from the centre (instead of the corner), hold down CTRL when drawing it.

- Double-click the mask icon in the tools panel and a mask is automatically created that matches the width and heigth of your composition.

- Activate the Free Transform option for the mask by double clicking on a point in the shape. You can then resize, rotate and scale the whole mask.

- Hit M and you activate the Mask Shape option in the timeline. Hit MM and reveal all the options of a selected mask (or all masks in a selected layer). Hit F and reveal only the Feather option.

- Click on a point in the mask with the Pen tool active to delete it.

- Click on a line in the mask with the Pen tool active to add a new point.

- Alt-click on a point in the mask and you create a Beziere Curve handles for smooth shapes. If you want to break the Bezier handle, just click on it with a pen tool - you can then adjust handles in paralell.

- Deselect a mask by hiting F2 or Ctrl+Shift+A.

- Martin

Saturday, 25 April 2009

Rejected Submission

I did this video for the AEtuts+.com site, intending to submit a complex tutorial there. Unfortunately, it was rejected, because a new version of Trapcode Particular (which is heavily used in this animation) is currently on its way to stores and there's no interest in the old version anymore. So...at least I'm posting it here.


- Martin

Wednesday, 22 April 2009

More Photoshoping

I think I've found myself a new toy. It's called graphic design...


- Martin

Sunday, 19 April 2009

Photoshoping

I think I was too blinded by After Effects and I didn't see the true power of Photoshop. Not anymore.

Touch:


Feather:


- Martin

Saturday, 18 April 2009

MK Design

After a quick Adobe Photoshop tour I realized there's something about graphical design that I really like. For some Photoshop fundamentals visit 3DBuzz that offers not only loads of awesome (and free) 3D tutorials, but also a PS basic course. You'll find it there in the Misc Training section (after registering). For some fancy PS effects, visit Photoshop Cafe.


- Martin

Thursday, 16 April 2009

Updated Showreel

While some of the shots in the original showreel I posted sometime ago were a bit too old and did not really represent my current FX skills, I decided to post here an updated version. With the never before seen footage from Threads of Destiny. Enjoy.


Martin Klekner Showreel 2009 from CamperCz on Vimeo.

And I also must post a beautiful AUDI commercial I found yesterday on http://motionwroks.com. Great idea, superb execution, beatiful motion graphics.


- Martin

Saturday, 11 April 2009

A Bit of Theoretic Knowledge

Selections

Extracts from the book Adobe After Effects 7 Studio Techniques

Every 2D compositor knows them - selections are key to our work. They basically specify what can and what can not be seen in a composition and thereby allowing to blend more layers into one image / video. There are several ways this can be done in After Effects.

a) Pull a matte: We basically create the invisible part of a layer ourselves. There are many ways to do that and you can find almost all of them in the Effects&Presets window -> Keying. From color keying, contrast keying, difference keying to all sorts of advanced methods, the result is always the same - you extract from the layer what you want (e.g. an actor) and make the rest transparent.

b) Use an Alpha Channel: Ever wondered what the Alpha channel is for? Well, it is basically defines the transparency of a layer. If you hit the Alpha channel view in a Composition window, you can see that some parts of the layer are white (visible) and some are black (transparent)...or, as it is in most cases, you can see just a pure white color. That's because the layer doesn't include the alpha channel (typical for camera videos where transparency isn't specified). Alpha Channel often comes only with CG videos, where the author already created it. You can create Alpha Channel in AAE also - just hit the Output Modules in Render dialog and set rendering option to RGB+Alpha.

c) Draw a Mask: The worst, but often a painfully necessary choice. If your actor goes off the greenscreen, if you don't have any Alpha Channel and no way to key things out, it's all there is left. Draw masks around the shapes you want to preserve thus making them visible while deleting anything around them. It is quite easy for a still shot...but it's outright hell if you need to rotoscope a mask that contains more than a few points (= anything more than 4-6 is A LOT) in a video longer than a few seconds. Believe me, I did it already and I've hated it every since.

d) Use a Blending Mode: Blending Modes ( define ways your layer is implemented in a composition. Different Blending Modes cause different effects and unless you know exactly what every single one of them does, you'll probably need to experiment a little (e.g. different types of transparency with Screen, Add, Ligten, Darken, Color Burn etc. modes).

There are of course tons of possible combinations as well as some special methods using effects (Curves, Levels, Generated or Simulated come with the Alpha channel included).

- Martin

Wednesday, 8 April 2009

ME

A short video I've made for our school project. We were supposed to characterize ourselves in one minute. And...this is me. Always focusing on the wrong things, I guess :-D.


- Martin

Saturday, 4 April 2009

Peek at Threads of Destiny

As promised, I post here an image from Threads of Destiny. This is one of the first shots I've composited, featuring three main actors.

Before:


After:


- Martin

Friday, 3 April 2009

Adobe After Effects Tips #6

Working with time, Motion Blur

Extracts from the book Adobe After Effects 7 Studio Techniques

- In the Time Stretch tab (Right-click on a layer -> Time -> Time Stretch) you can make the layer run slower (more than 100% in the Stretch Factor dialog) or faster (less than 100%).

- You can reverse a layers time by hiting Ctrl+Alt+R or typing -100% in Time Stretch tab. You can enable Time Remaping by hiting Ctrl+Alt+T. You can also freeze a layer (showing only the freezed frame all the time) by choosing Layer > Time > Freeze Frame command.
- When you make a video slower, the motion appears jerky, it's because some frame are duplicated (e.g. when you make it 50%, every second frame is duplicated - it's just not there, for the camera shot on a certain frame rate and it doesn't have more frames to show). A basic solution is to activate Frame Blending (Right-click -> Frame blanding). You have to options there, Frame Mix and Pixel Magic. Frame Mix basically blurs two frames together. However, the option you want to choose is Pixel Magic - it creates unique frames scanning its pixels and warping them together. You can also find the Frame Blending icon in your timeline Columns.

- You can also make it faster or slower (= stretch it) to a specific point. Just go to a frame you want to stretch it around and then in the Time Stretch tab choose Current Frame.

- You can set an exact amount of motion blur in your composition. Go to Composition Settings -> Advanced and choose your numbers in Shutter Angle (how long the shutter is open, higher number will make more blur) and Shutter Phase (when the blur starts, 0 means it starts when the object starts moving, if you add bigger number, the blur occurs some time after the start of animation).

- A formula for calculating Shutter speed properly is following: shutter speed = 1 / frame rate * (360 / shutter angle).

- Setting Shutter Phase to 50% is useful when motion tracking - the image is less blured.

This was the last part of my After Effects tips focusing on workflow. I hope it helped at least a bit.


- Martin

Wednesday, 1 April 2009

Adobe After Effects Tips #5


Animation Methods, Graph Editor, More Shortcuts


Extracts from the book Adobe After Effects 7 Studio Techniques

- Hold down SHIFT when animating (moving objects, adjusting a value etc.) and the value will be changed at ten times the normal amount of change. (When animating objects it's 10 instead of 1).

- Hold down CTRL + ALT to change a value at one tenth the normal amount.

- Select the Show Audio Waveforms option in Graph Editor options menu (the eye icon in the bottom) to show Audio Wave in the Graph Editor. You can do the same this with expressions. I found it quite useful when compositing a video into music.

- You can flop a layer horizontaly just by selecting the Layer, hiting S for Scale, unchecking the Constrain Proportions (the little icon to the left from the 100% value) and write -100% for the horizontal value (the first one). You can also flip it verticaly. Just - to the second value.

- Hit a keyframe and press F9 - you add Easy Ease Bezier Interpolation to the animation curve. Hit Shift + F9 and you add Easy Into the Keyframe animation (bezier into the frame, sharp edge out). Ctrl+Shift+F9 adds Easy Out of the Keyframe (the other way around).

- To reset the Keyframe from Easy Ease to linear, just Ctrl click it.

- In the Graph Editor, the Y values indicate the speed of an animation, while the X values represent the time.

- Hold keyframes are useful to stop video at a certain point in time. Just Right-click a certain keyframe and click Toggle Hold Keyframe (Ctrl + Alt + H).

- If you want a certain effect options to be visible even when you start working with different composition, just hit the small Lock icon on the top of the Effect Controls tab.

- With a layer selected, hit U to reveal all the keyframe data this layer contains. Hit U again to hide them.

- Hit UU with all the layers selected and you see all the transforms made in the project. Great tool!

- Hit E to see all the layer's applied effects.

- You can set a keyframe for any Transform value (Position, Anchor Point, Scale, Rotation, Opacity) by hiting Alt + Shift + propertie's shortcut (P, A, S, R, T).

- Deselect keyframes by hiting Shift + F2.

- Wit a set of keyframes selected Alt-Drag on the corner ones to lenghten or shorten the animation.

- You can adjust Anchor Point without changing the animation (for when you move it after you've animated a position, it changes the animation also). Just Alt-drag it and your animation remains the same, even though


- Martin

Monday, 30 March 2009

Working on Threads of Destiny

I am proud to announce that I've become a part of the Threads of Destiny postproduction team as a 2D compositor. This independent movie from Sweden is currently one of the most anticipated Star Wars fanfilms in production.

I myself was a fan of this project since 2006, so having a chance to participate is like a dream come true for me. And it definitely is a great challenge and test of my VFX skill also. I'm sure I'll learn a lot.

The story:
"100 years after "Return of the Jedi" the Jedi order and the Republic are once again active. The planet Coreign produces a special ore that can power an entire city. But the Skenvi empire is interested in its potential for supreme spaceship armor." (From threadsofdestiny.net)


Star Wars: Threads of Destiny trailer.

Watch the trailers on the homepage, read the info there and stay tuned for more.

- Martin

Saturday, 28 March 2009

Above the Clouds

I've been trying to create this effect for soo long. Finally, thanks to a wonderful tutorial by Markus Gustafsson I was able to polish my version of "above the clouds" logo. And I love it.


- Martin

Friday, 27 March 2009

Thursday, 26 March 2009

Action Shot

I created this shot as a test of my action VFX. Also, I tried to create a nice film-look for my PAL video. I used an artificial Depth of Field method, some dark vignette and greenish filter as well as a lower frame rate (24). Apart from the gun and blood effects, of course.


- Martin

Monday, 23 March 2009

Adobe After Effects Tips #4

The Timeline Organisation

Extracts from the book Adobe After Effects 7 Studio Techniques This time some tips focusing on optimizing your timeline workflow.

- You can hide any column you want by clicking on the column's title (e.g. right-click on the Parent column) and choosing Hide this. You can also add any column you want by choosing Columns-> and the one you want.

- You can customize your Column layer's set by adding any column you like and then swtiching to another layer (F4 or little bracket icon on the Toggle Switches/ Modes icon on the bottom of the timeline).

- You can rename the layer by selecting it and pressing Enter.

- Even if you're working just by yourself, it's always good to have your timeline clean and organised. Besides naming your layers, you can easily give them different colors (I like having Video layers blue, Audio green, Adjustment white, Camera red and Light yellow - for example, you can choose any color you want). Just right-click on the little rectangular icon right next to the name of the Layer and pick the color you want.

- In case you're working on a project with some other people, you can leave a comment for them in every layer. Just add a Comment column and type what you need. In case you want to add a comment on a specific frame of the video, just find the frame, press *, double-click on the marker that appears and add a comment. You also have several other options, like naming the marker as a Chapter, adding URL etc. Thing is that these are suported only by formats like Quick Time or SWF.

- If you're done with working with a layer and you want to hide it in the timeline, you can switch the little Shy marker for it. It's the first one on the right - when the little guy peeking over the line is gone, the layer is set for shy. Then you just need to activate the Shy controller above it to hide all the layers set for shy. This way you hide them in your timeline, but not in your composition.

- To lock selected layers quickly, hit Ctrl+L. To unlock them, hit Ctrl+Shift+L.

- Page Up / Down moves you by one frame in the timeline. Shift+PG Up / Down skip 10 frames.

- Move through the layers by hiting Ctrl + Up / Down.

- If you want to trim your work area, just hit Composition -> Trim Comp to Work Area.

- Ctrl + D duplicated layers, Ctrl + Shift + D splits them.

- To set the start point of a layer, highlight it and hit [ (] for the end point).

- You can make a selected layer to fit the Comp size by right-clicking on it and selecting Transform -> Fit to Comp (Ctrl+Alt+F). You can also choose to fit its height or width.

- You can zoom in your timeline by holding down Alt + rolling your middle m

- Switch between Timeline and Composition window by hiting \ .

- If you want to replace a certain layer in the composition by another layer from your project window while keeping all the effects and keyframes inside the original layer, just highlight the layer you want to be replaced and hold down Alt while draging the new in the Timeline. Very useful things, much better than copying all the settings of the original layer.


- Martin

Saturday, 21 March 2009

Adobe After Effects Tips #3

Examining the Footage

Extracts from the book Adobe After Effects 7 Studio Techniques by Mark Christiansen. This time some tips on how the real visual artist examine their footage. I know there's no one on this blog really reading it , but you know...no reason not to post it :-).

- Read and understand the Info panel. 2% of R, G and B instead of 0% means your black is not black (it often an effect caused by render, when colors loose a bit of quality), as well as while 100% white is OK, 300% white means someone's been messing with your intensity. Just roll over the footage with your mouse and read the color numbers - being precise means beeing good.

- In the Time Control window, right next to the RAM preview icon, there's a Loop controller. By clicking it you can choose whether you want to loop the preview, play it once, or play it in a ping-pong style (forward-backward-forward...). Note that good visual artists not only let their preview loop, studying the footage carefuly for several minutes, they also study it when playing backwards.

- Zoom your footage and examine the crucial spots in more detail.

- Don't be affraid to switch color channels (Show channel icon in your Composition window, right next to the resolution icon) and examine the footage one by one.

- Try to examine the footage with high black or white level. Just put some Adjustment Layer in, add Levels effect and observe everything under different levels.

- Be precise. One little error can spoil your whole render. Keep looking for mistakes you might not see, for they often cause the greatest problems.

I learned to love the Studio Techniques book. Even after finishing the first Chapter, it can't wait to continue learning.

- Martin